Summary
This level was created as a study of the mechanics used in the universe of Death Stranding. This meant the level only used mechanics that are present within the existing game. While designing the level, I kept in mind how the space can impact player movement, hide or hint at valuable loot, and include covered areas to hide from the “Timefall” rain. I designed a medium-sized open world section that included 4 unique locations/points of interest for the player to discover, loot to collect, traversal puzzles that utilize the building mechanic, and a short mission/task that requires the player to enter enemy territory and acquire stolen goods.
Project Details
– Created during a “Level Design Weekend” challenge where designers within the Level Design Lobby community create a full level blockout in 48 hours
– Built with Unreal Engine 4
– Level Study of Death Stranding’s Open World design
– 3rd Person Open World Adventure gameplay
– Level Blockout Exercise
– Blueprint Visual Scripting Exercise
Level Brief:
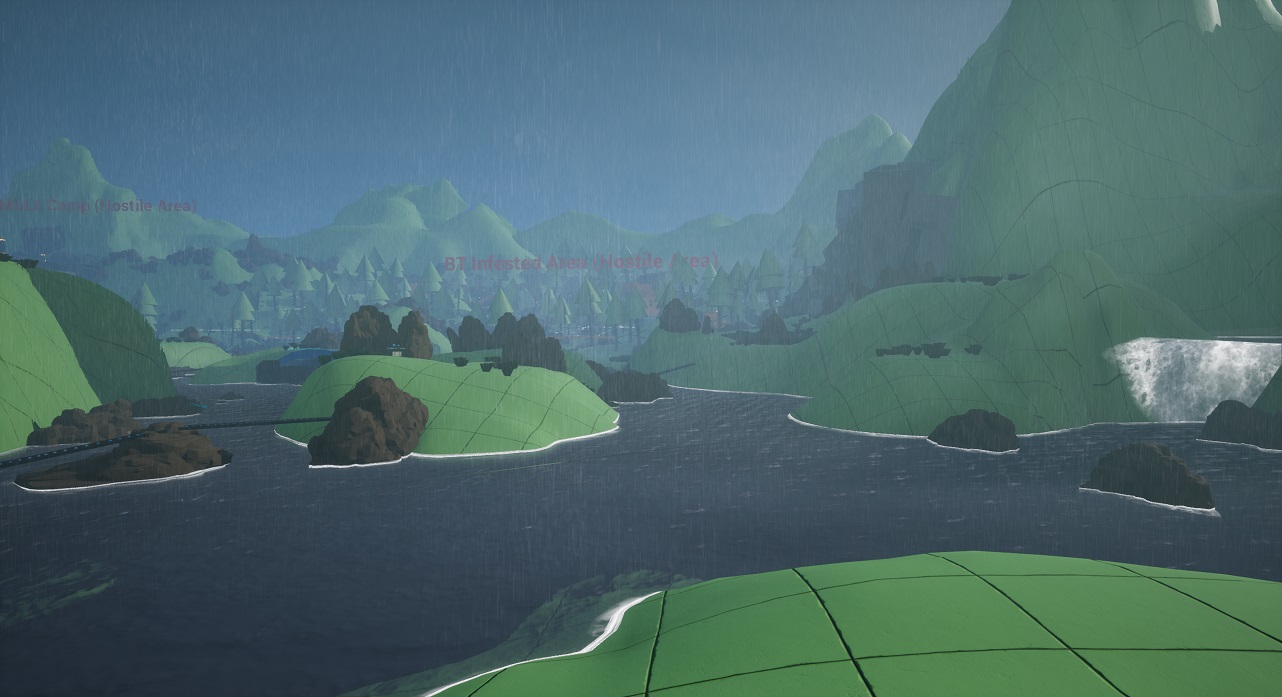
Players start at the Personal Safehouse in a large cave then find the Prepper Shelter near a waterfall. After finding the shelter, Players take on an Order to recover some lost cargo to bring the Prepper into the Chiral Network. Players can either take a long way around the mountain leading up to the MULE camp, or take a shortcut through the forest. However, taking the shortcut involves moving through an area affected by Timefall and heavily infested with BTs. As Players reach the MULE Camp, they can find the target cargo spread between 2 Post Boxes. Once collected, Players must return to the Prepper Shelter to turn in the order to end the level/mission
GAMEPLAY OVERVIEW
Challenging Environment Traversal
I added shortcuts over difficult to climb boulders, gaps that needed to be crossed by any means necessary, and conveniently placed rocks near large bodies of water that the Player could choose to overcome if they wanted a challenge.
Choosing the shortest path isn’t always the most efficient, and trying to jump a gap may not be worth the risk of breaking life-saving equipment and expensive cargo.
Enemy Camp Infiltration
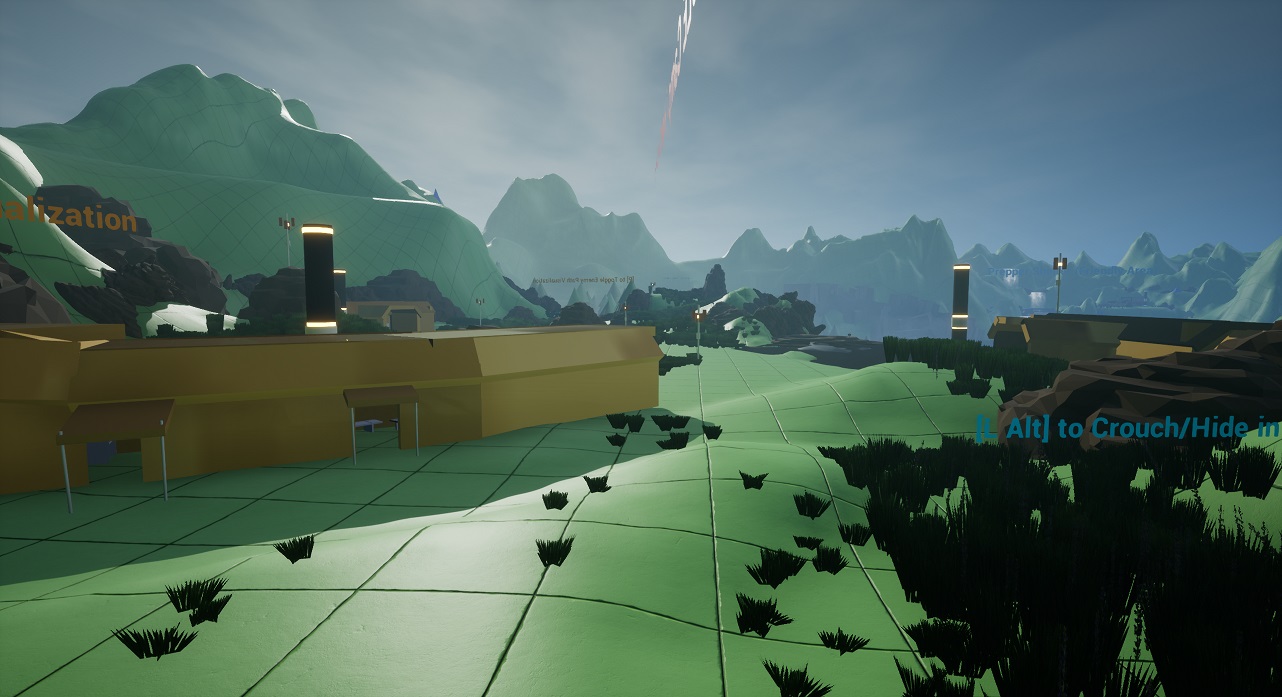
In addition to the environmental challenges, an enemy “MULE” Camp was built to entice and reward the Player with rare loot as well support a side-mission.
Players can safely examine the camp from multiple vantage points to take note of guard patrol routes and locations of cargo or helpful devices. If guards are alerted, the Player can run, try to hide in the nearby tall grass or fight as a last resort
Large Scale Environmental Hazards
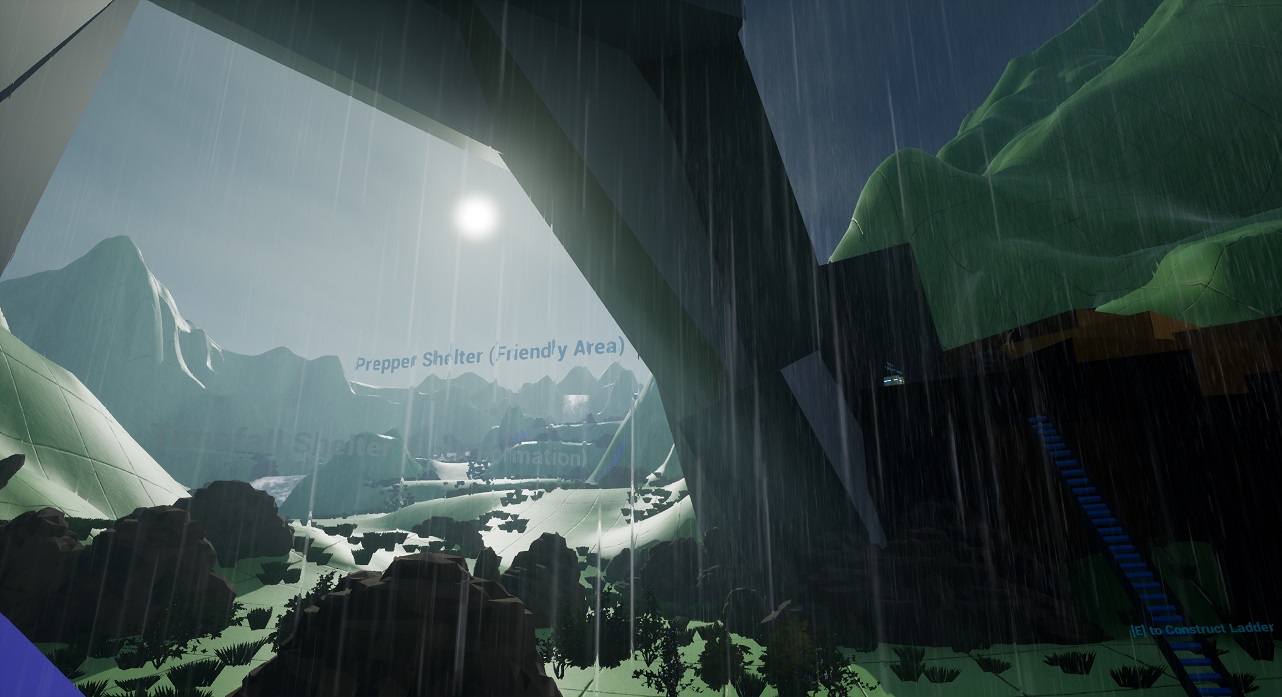
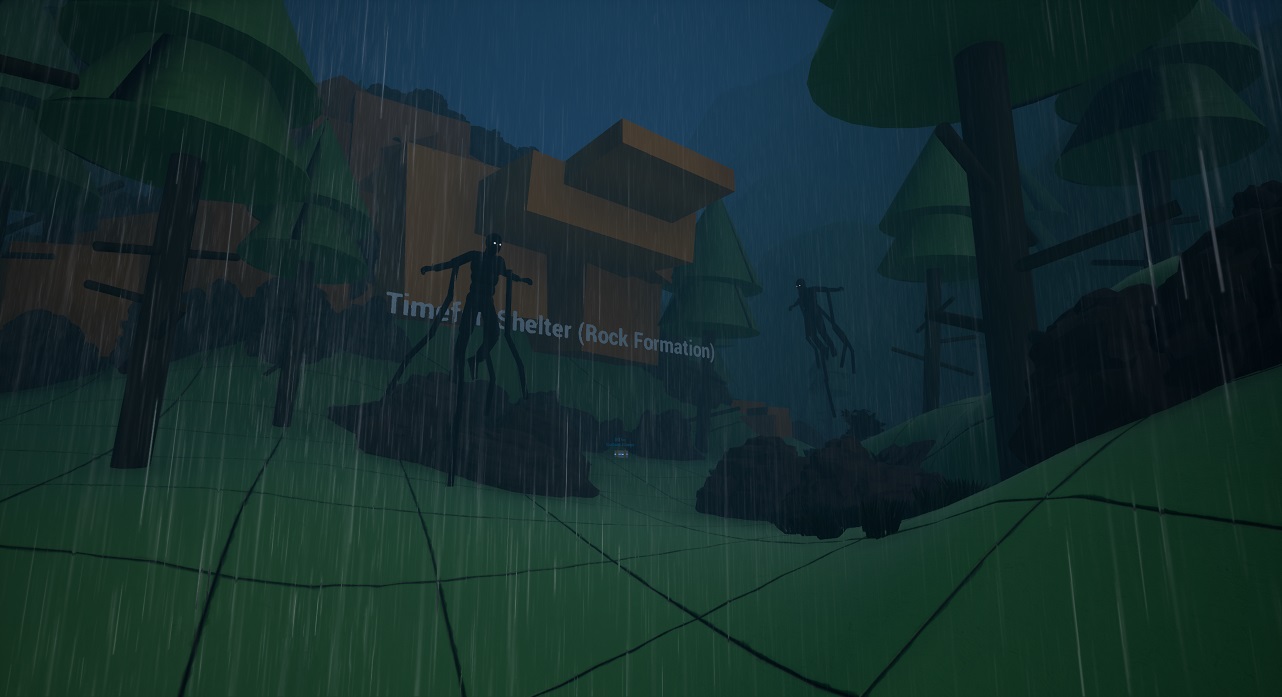
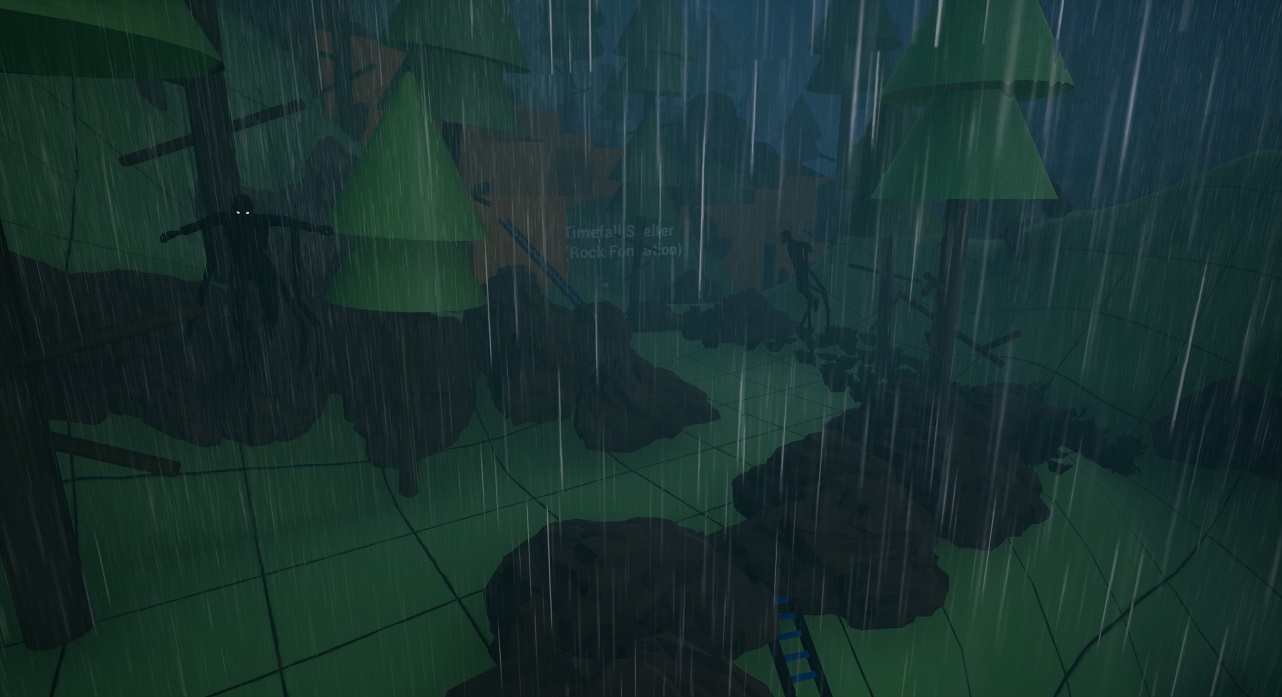
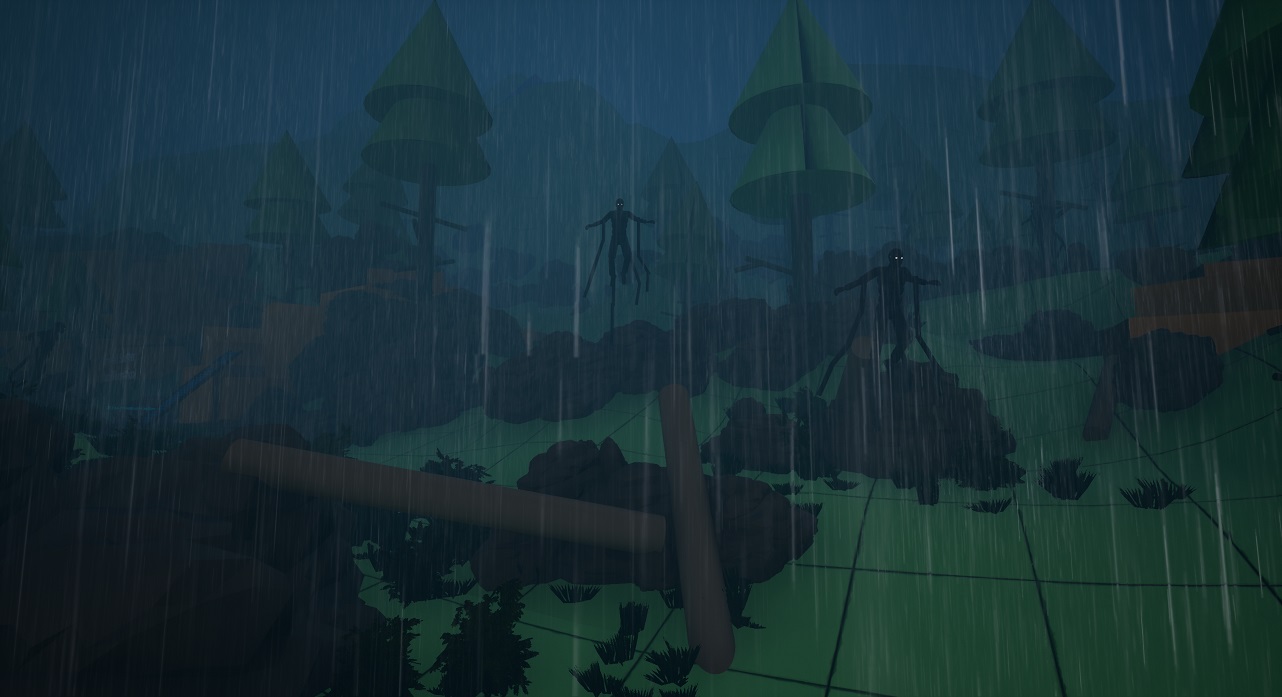
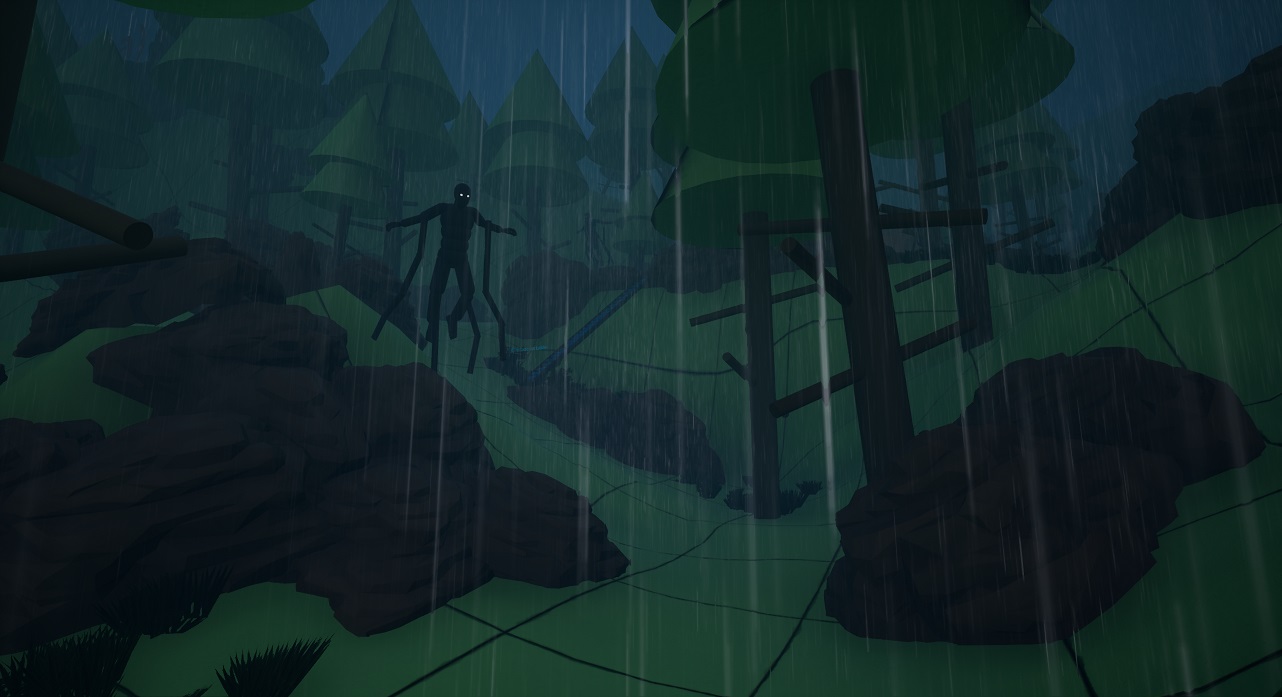
The “Timefall” mechanic that damaged Player’s equipment and cargo had a big influence on the shape of the landscape as I had to include multiple points of shelter for the Player to rest in between sprints.
It was a little tricky to pace, but I tried to make sure there was at least 3 pieces of shelter in the 2 large areas that had “Timefall” active. I made each piece of shelter as obvious as possible by using caves and large rock formations to signal safety to the Player from a distance, ensuring they couldn’t miss it if they were in need.
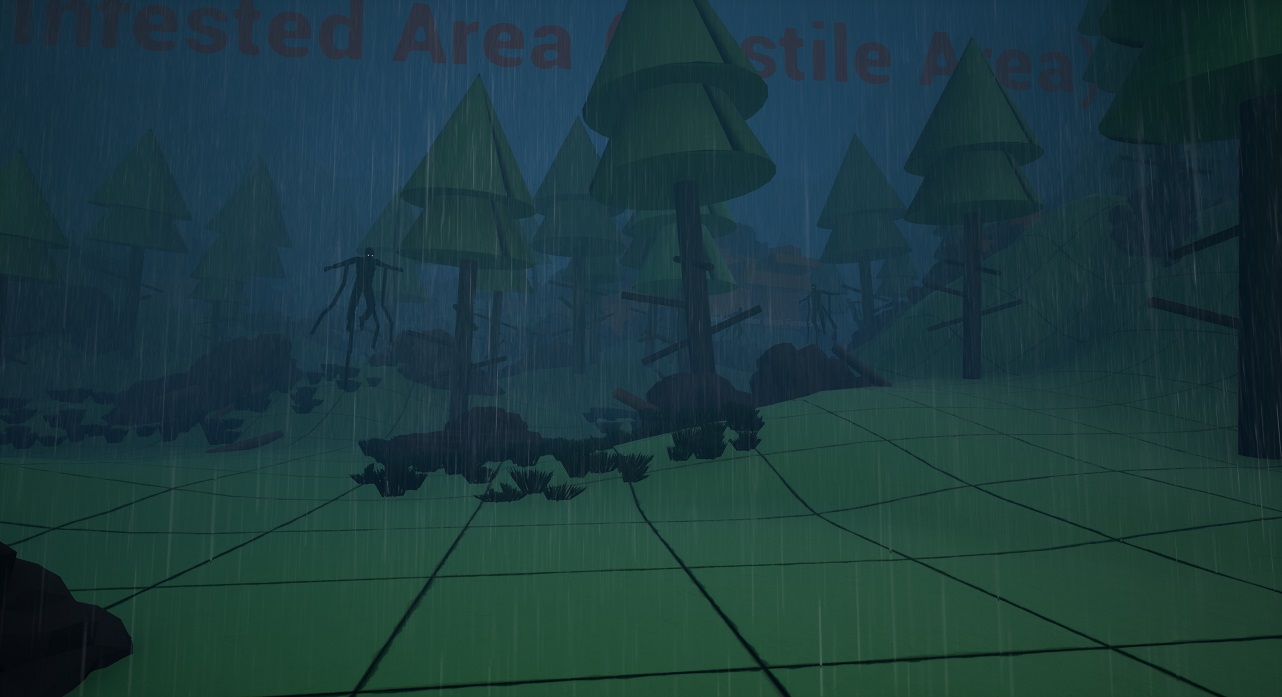
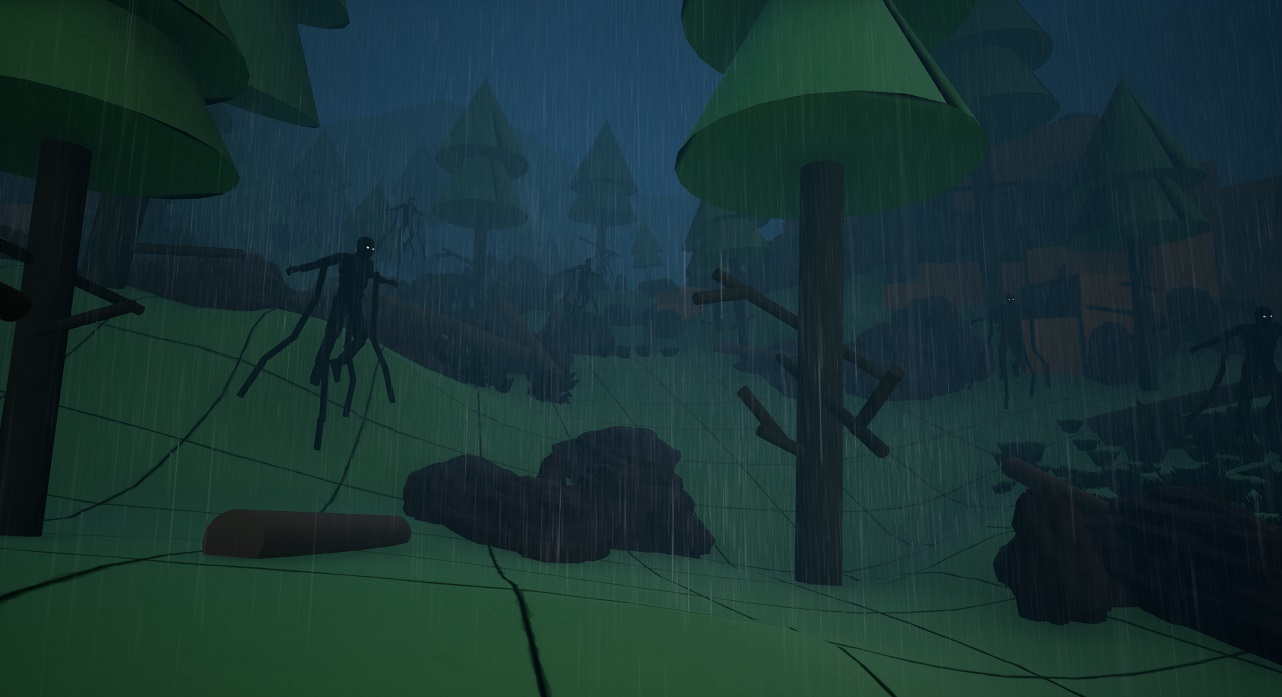
Sneak Past Unstoppable Forces
The “BT” encounter can only be overcome by the Player via stealth methods. I set my encounter in a small forest that the Player had to ascend through while avoiding the gaze of the barely visible monsters and moving between shelters as to not get too damaged by the “Timefall” raining down.
With multiple paths through the forest, I hid helpful items and shelters with recharging devices off of the more obvious path to reward Players that weren’t afraid of the monsters and wanted to explore.
Rest and Recharge at NPC Shelters
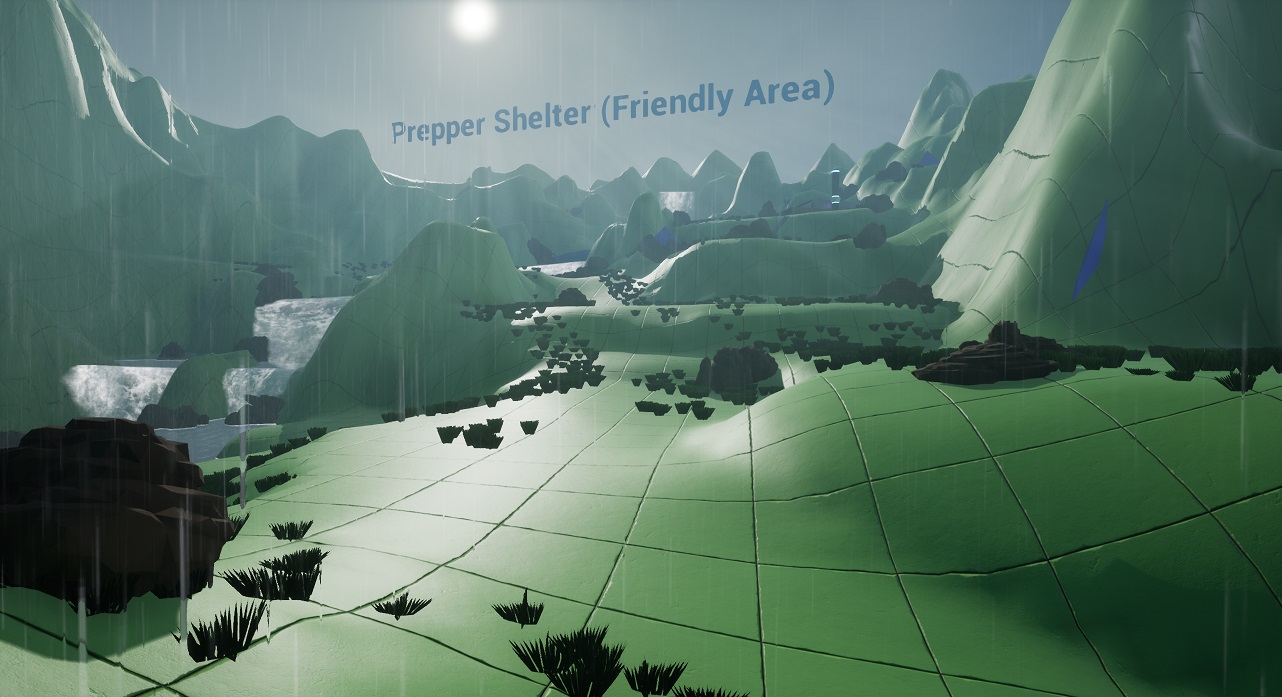
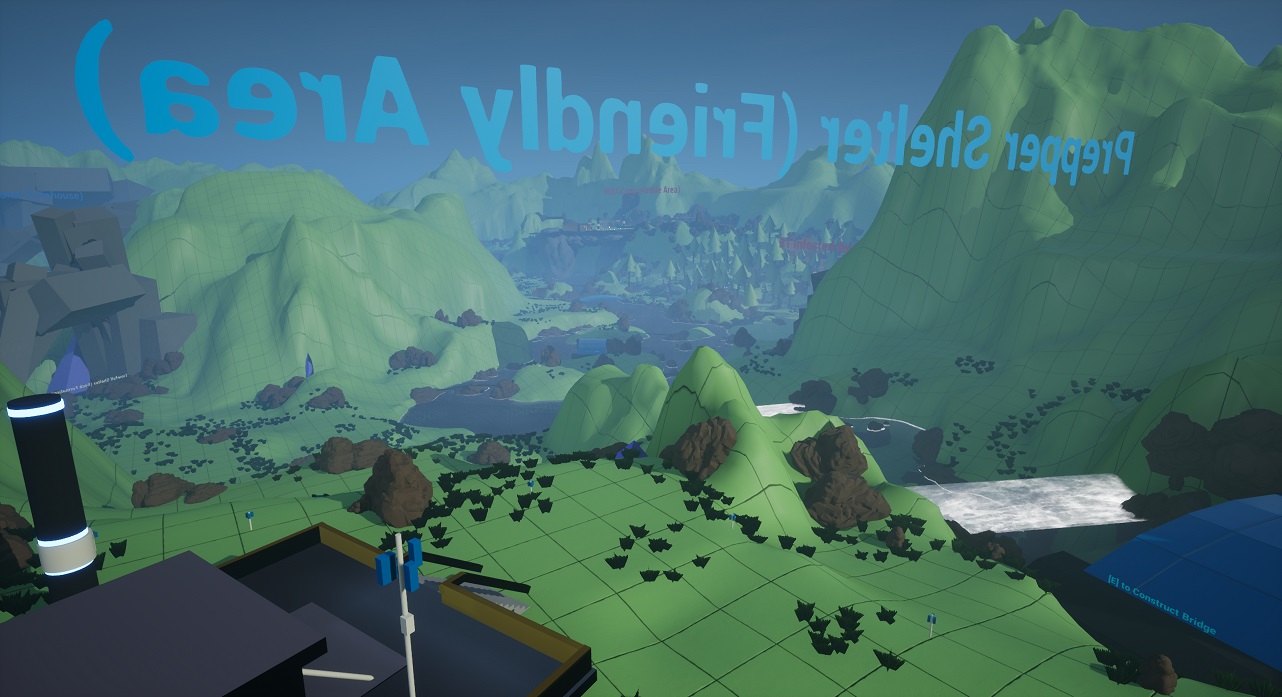
A “Prepper” Shelter was also added to give the Player a safe area to rest and replenish any of their consumable equipment(s) while also being able to accept any available missions from the NPC staying there.
With large pillars and a recognizable structure, this shelter stands out as an obvious point of interest to the Player and signals that a safe space is near. However, this wasn’t going to be the easiest shelter to get to as Players needed to use precious materials to create a bridge to cross the rushing river blocking off the shelter.
Level Walkthrough Video
PRE-PRODUCTION

Map Overview
One criteria of the challenge was to include a top-down map. After a few different drawings in a sketchbook, I chose the map that looked the most fun and then used Inkscape’s pen tool to quickly draw out unique shapes that would compliment the exploration and traversal mechanics of Death Stranding.
Beat Graph
Though this was crafted to be a non-linear experience, I had an idea for what I thought the critical/golden path should be and created a Beat Graph to outline it.
Not criteria for the challenge, but I like creating a Beat Chart/Graph/Map for my levels so I can craft areas that help sell the feeling I want the Player to have when interacting with my levels at a specific moment.

Restrictions and Goals
My goal was to design a terrain with 3 small Points of Interest built into it and a mission that was playable with at least 3 mechanics/features from the game within 48 hours.
Without access to the full featureset of Death Stranding, I knew I needed to script some rough prototypes to help sell my ideas and limited myself to traversal aids (ladders, bridges) in pre-set locations so I could create more interesting terrain with fun and challenging traversal for the Player to perform, cargo collection for an enticing reward Player can earn while exploring the map level, and the “Timefall” hazard areas to create tension.
Defining the Setting
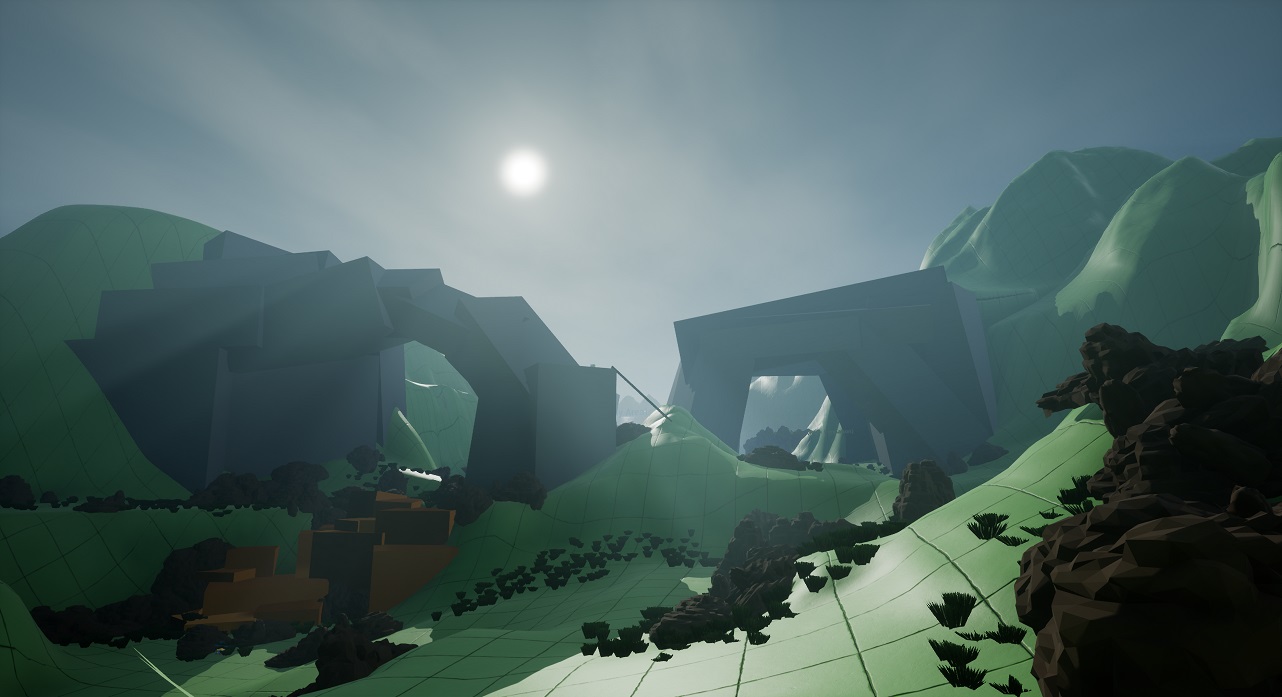
Given that terrain traversal is a core mechanic of Death Stranding, I chose to set the level in a grassy canyon-esque setting as I felt it had the most interesting terrain that would let me design with verticality, interesting twists and turns, and include big forests or mountains to help me frame key areas of the level.
I knew I wanted to use the “Timefall” mechanic in my level and thought it would be really striking and help create a sense of dread or tension if the weather suddenly changed from a bright, sunny sky to one with dim, dark clouds and heavy rain when the Player least expected it.

Reference Gathering
I started by collecting reference images of mountainous landscapes and in-game screenshots to use as inspiration for the layout of my level. References of caves and formations similar to basalt rock columns were used to help me create unique rock formations to use as landmarks and cool points of interest.
Defining Metrics
The locomotion system included in an asset pack I used required traversable meshes to be of specific, uniform sizes to perform specific actions. I had to take these into account when creating my traversal challenges as Players could become stuck or flung across the map if a mesh wasn’t scaled correctly.
Though I didn’t have time to make a metrics gym, I created a collection of Blueprints set to correct metrics that I could easily reuse when needed.
LEVEL BLOCKOUT
Environment Overview
I started by building a piece of terrain with 3 main points of interest built into it with some basic elevation and surrounding geometry, increasing in detail with each iteration. When I felt I had a good base, I added pyramids to help define the shape of the overall terrain to be more enticing to explore and exciting to traverse, especially near any of the points of interest.
With each additional iteration, I built upon each POI and it’s surrounding areas by further defining intended pathways in the terrain and adding simple shapes to sell the purpose(s) of each space. Keeping in mind that the Player could approach from a variety of angles, I tried to ensure that pathways to the entry points for each interactive space were obvious.
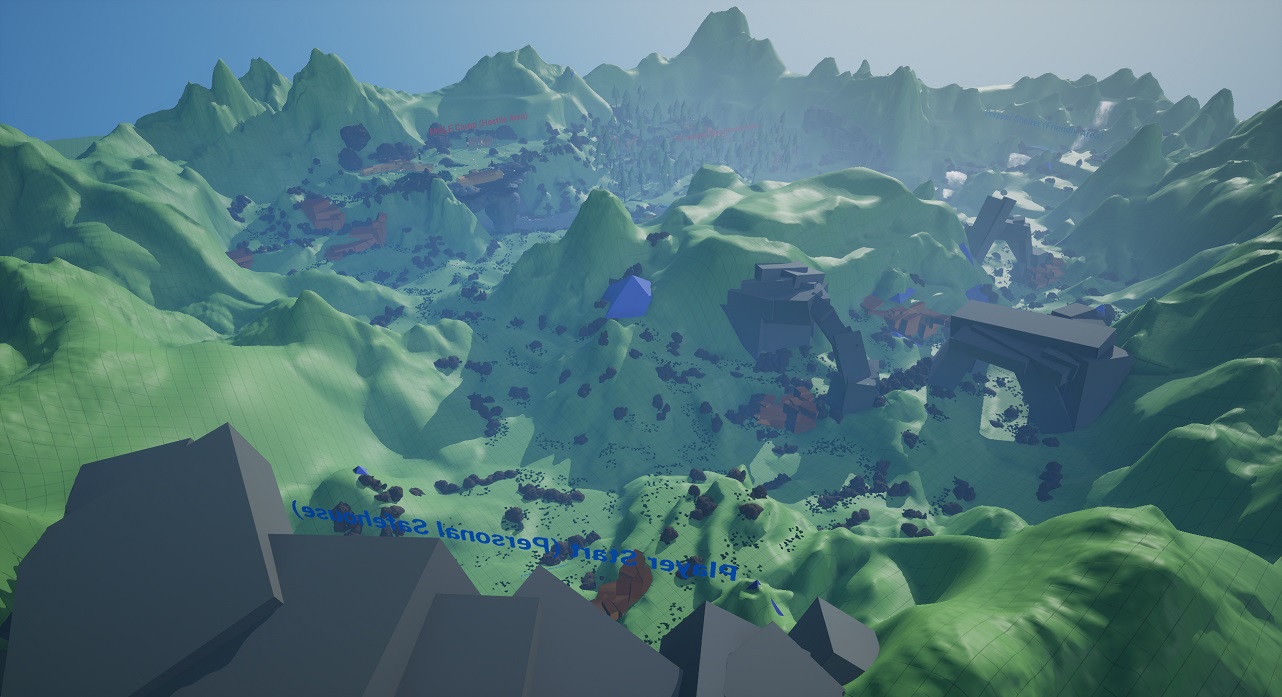
Player Start
I try to make my establishing shots as exciting as possible in order to pull the Player into the level as quickly and easily as I can, so placing the Player’s initial spawn point in an area with an obvious path towards that establishing view/vista was an important step when starting this level.
I built the surrounding area of the Player Start spawn point to wrap around and funnel the Player’s view to the mountain and surrounding canyons in the middle of the map in an attempt to create a sense of wonder by pointing the Player towards multiple paths and enticing landmarks in the distance.
Exploration Funnel
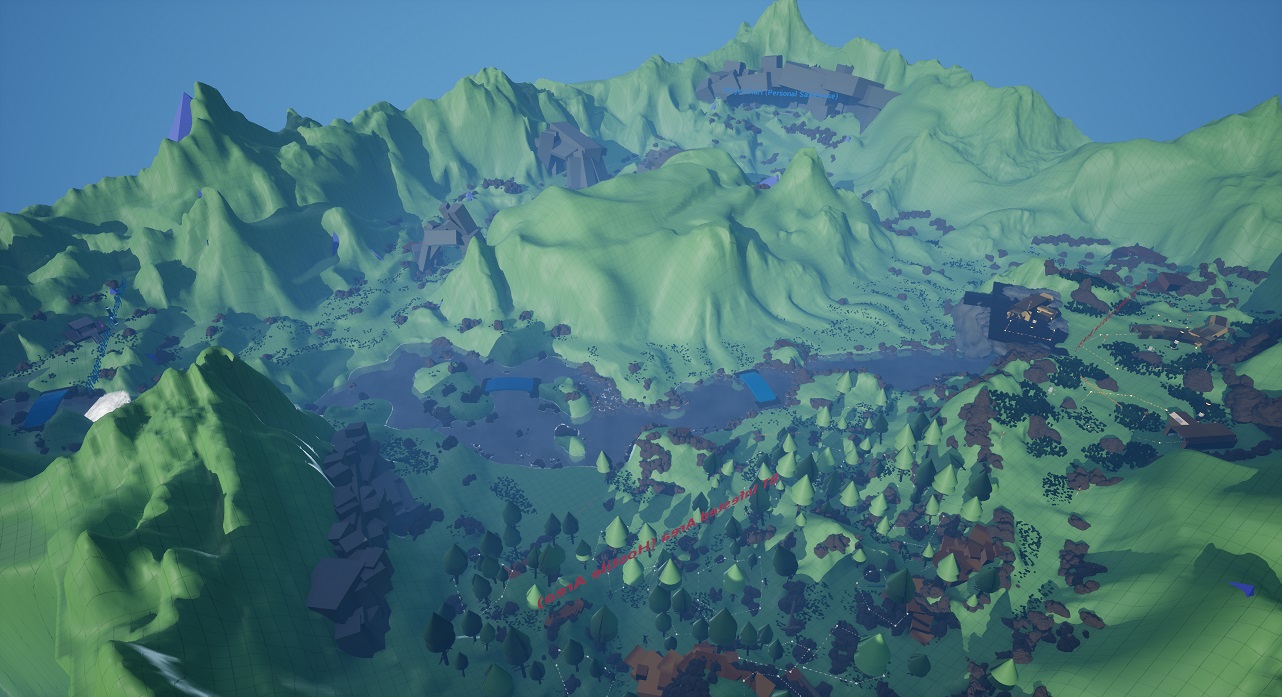
Along the critical/intended path, I wanted an area that let the Player utilize their tools and movement capabilities. I decided a long, winding canyon with varying elevation, unique rock formations, and dangerous cliffsides would give me the best options to design with while keeping the terrain grounded in reality.
This is the first place the Player encounters the “Timefall” hazard and needs learn to move between points of shelter. To ensure the sheltered areas were obvious through the heavy rain, I utilized elevation and matching rock formations as landmarks to signal safer areas to the Player.
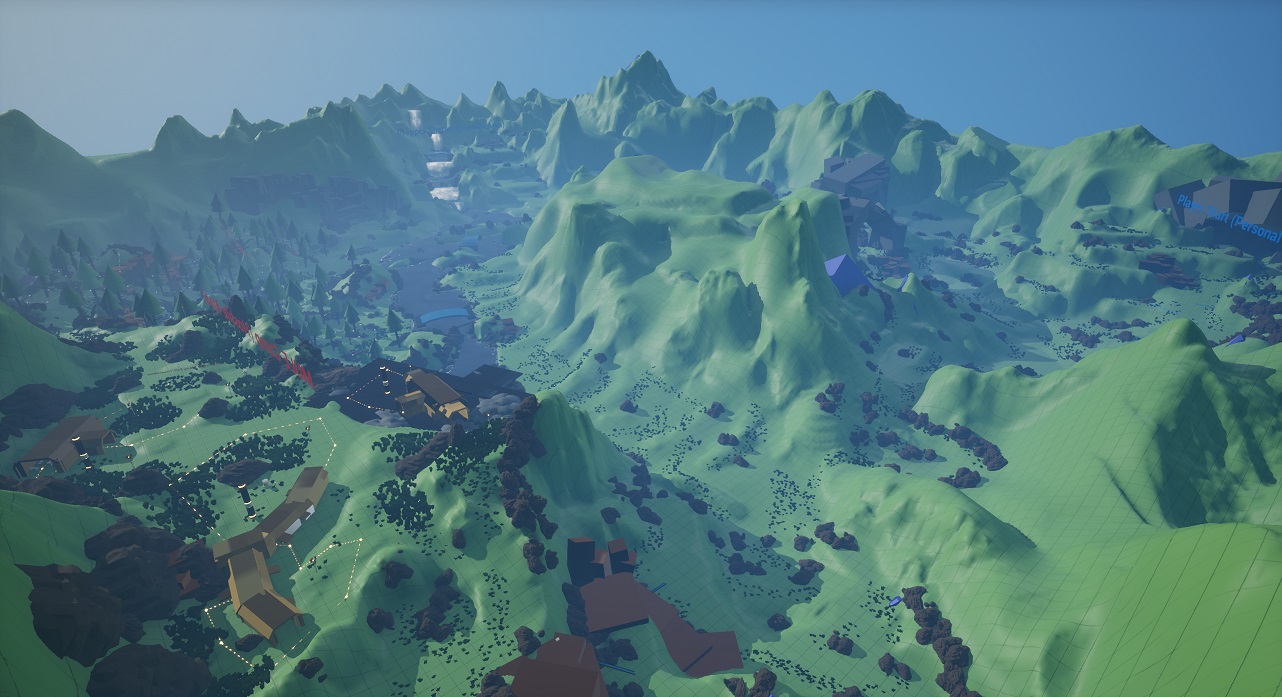
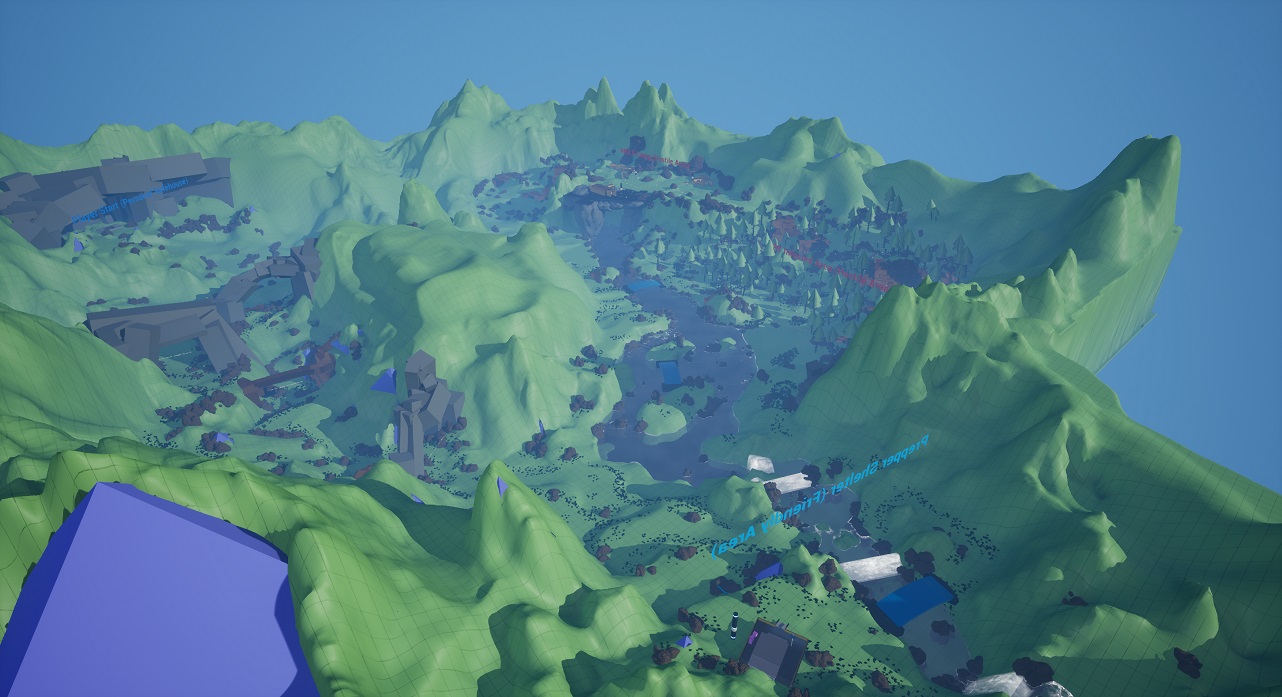
NPC Shelter
At this location, the Player can rest, drop off equipment/cargo, and take on Orders from the NPC residing there. To ensure this safe area stood out against the surrounding terrain, I placed it at a higher point of elevation next to a waterfall with small hills and rocks along the path up that occluded some sections of the path up.
The combination of inorganic structure, elevation, movement from the waterfall, and partially occluded path really made this area stick out and helped give the Player a path towards their goal.
Stealth Area
The area was built as a sort of winding ramp so the Player could feel a sense of accomplishment as they avoid monsters and find creative paths upwards, towards their next destination. I used trees to create a walled-in space that would make the Player feel secluded and increase tension as they snuck past dangerous entities.
Medium-sized hills and fallen trees were used to break up and occlude the obvious path up as well as provide geometry the Player could use their traversal tools to move overtop of in order to sneak past the deadly “BTs”.
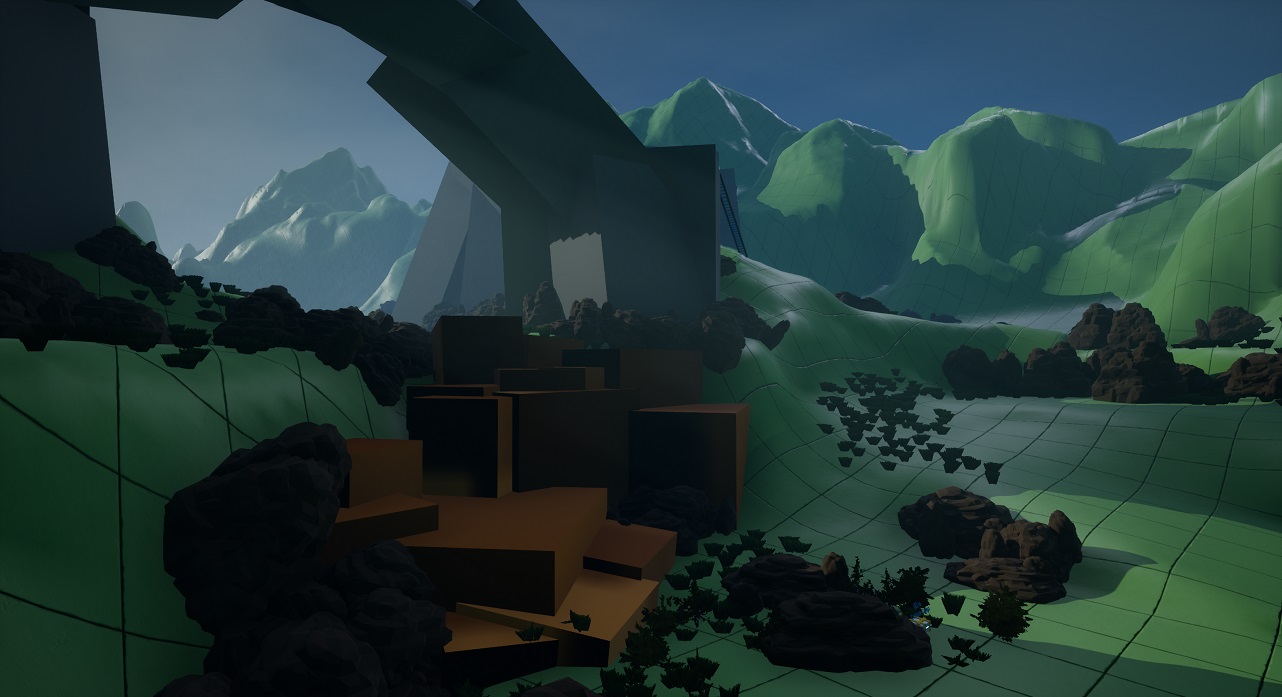
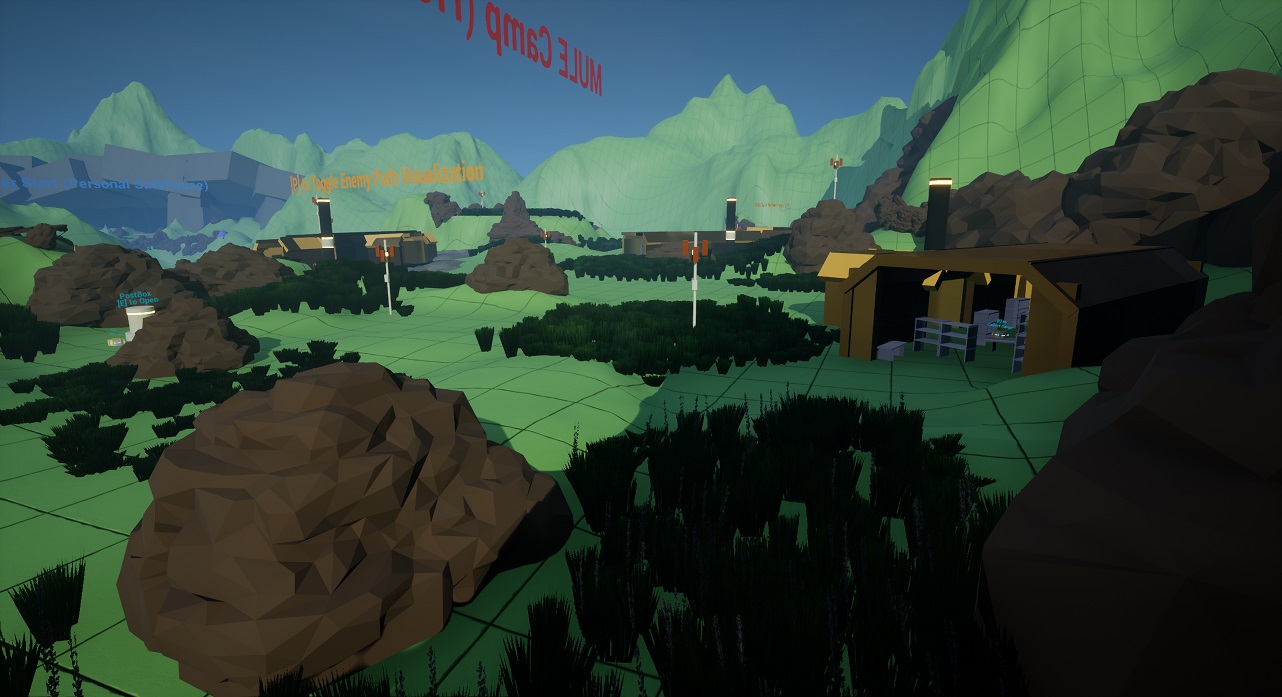
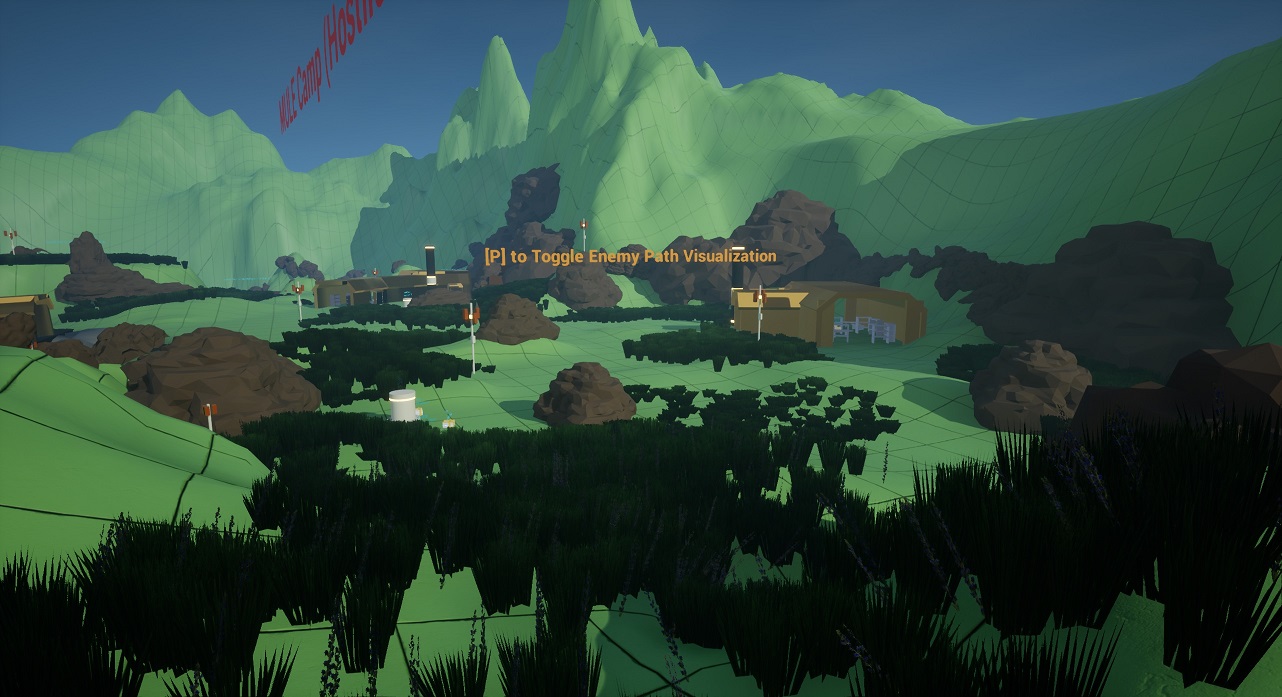
Enemy Camp
This camp contains the Post Boxes that store the Cargo requested by the NPC at the Prepper Shelter. To make the location of the Quest Cargo obvious to the Player, I placed the Post Box objects in central areas of the camp, surrounded by tents and patrolling enemies.
To give the Player a fair advantage, I created vantage points near each entrance that they could observe the camp from. This gave the Player a chance to observe the guard’s patrol paths, extra loot locations, both Post Boxes, and plot a (theoretically) safe path through the camp.
Gallery
DESIGN TECHNIQUES
Pushing and Pulling the Player
Outside of dangerous encounters, I utilized the triangular shape of mountains, cliffs, hills, and/or boulders formations to push and pull the Player through various valleys and canyons. I found that including clusters of these shapes helped entice the Player to move forward and explore.
To help the Player know where to go at a glance, I would place similar shapes like rocks in clusters or fallen trees near viable paths or pointing in the “right” direction to help create a sense of weight and pull the Player toward a new area even if they didn’t always realize it.
Prototyping with Blueprints
Utilizing Unreal Engine’s Blueprint visual scripting system, I quickly prototyped similar functionality one could find in Death Stranding. Such as constructing Ladders and Bridges, collecting Cargo from the terrain as well as Mailboxes, as well as a short interaction with an NPC found in a shelter.
I feel the addition of these mechanics, though very limited, greatly helped me attempt to emulate the general design of a Death Stranding level and quickly test the fun of my level while making worthwhile changes.
Encouraging Player Agency
I think Players should always have a choice in the path they take, especially when playing an open world game. With the use of the terrain tool and lots of reference photos, I tried to create a unique terrain that offered the Player the option of choosing their desired path without breaking the flow of the game.
Additionally, I scripted the mission of this level to be more free-form and allow for the Player to interact with each Point of Interest any order. This meant they could travel to the enemy camp and collect the cargo needed for a mission they receive from an NPC prior to reaching the shelter that the NPC is located in!
Guiding the Player
I tried guiding the Player to key objectives or locations with a combination of motion, light, effects, as well as spatial composition.
In the example, removing the rain weather effect to make the sun beams shoot towards the Player draws their attention to the waterfall in the cliff above. Once they take in the scene, they can see elements of a Shelter nearby, signaling that a point of interest is just ahead.
Giving the Player an Advantage
Vantage Points near enemy camps and Vistas in mountainous areas were built to give the Player a chance to see what kind of terrain was ahead, weigh their options, and plot their route to safely reach the next objective or point of interest.
Viewing recognizable landmarks let the Player see how far they’ve come and help them mentally map the space. In addition to giving the Player an advantage, these also let the Player a break and enjoy the scenery.
POST MORTEM
What went well?:
– I was able to create a short, semi-linear experience in an open world style level with some interactive elements, fun exploration gameplay, and a functional end goal in 48 hours! The “Level design jam” was a great experience that really allowed me to see how much I can get done in a short amount of time.
– I learned a lot about designing for open world spaces and ensuring the Player always has a good sightline towards points of interest and understand what kind of area they’re moving towards, regardless of how they choose to approach it.
– I got to further study a game I spent a lot of time with as an end-user. Designing a level that I thought would be fun in the Death Stranding universe that utilized it’s mechanics (albeit in a rough way) was a great time.
What went poorly?:
– I lost a lot of time to being picky with finer details of the environment and fighting with the Foliage Tool
– I don’t think my level was the most readable… Though each area feels pretty distinct from each other and the way I formed the terrain helped break up the space, I think the flat, green grid texture was too plain and made it difficult to visualize a path. Using a different material to rough out some dirt paths would’ve immensely helped the readability of the level and brought the scene even more into the Death Stranding visual style.
– I focused on some areas more than others, and I think the areas that were more neglected suffered and weren’t as fun to play through. Some general structure, such as the main path up a cliff, just didn’t feel realistic or challenging to be in a game that focuses on traversal across large amounts of terrain.
What did I learn?:
– I don’t think I should’ve spent as much time on small details as level structure can change drastically with new iterations, and what was once a good idea may not be in the future. My first idea isn’t going to be the best idea and I need to let go of the finer details and focus on finding the fun in my designs.
– Became more comfortable with the terrain too and using it to build more vertical spaces while utilizing the available space within a level’s bounds.
– I’d like to have spent more time focusing on gameplay interactions. Though I had the level blocked out, it felt sort of empty/flat because there wasn’t a lot of things the Player could do other than move around the space and hope to find a space to place an object. If I could have prototyped a portable ladder the Player could place on their own, I think I could have discovered a lot more interesting and less limiting challenges/scenarios for the Player to enjoy.